MonoGame Setup
Time to do some Game Dev!
First we will need to go through the installation steps for MonoGame Steps: Here
This Guide will be for MonoGame on Windows but there is steps in the documentation for other platforms. I will quickly go through the steps but I highly encourage going through the documentation yourself aswell.
First we will install Visual Studio - This will help speed up the install process
When installing make sure to select the correct .NET options
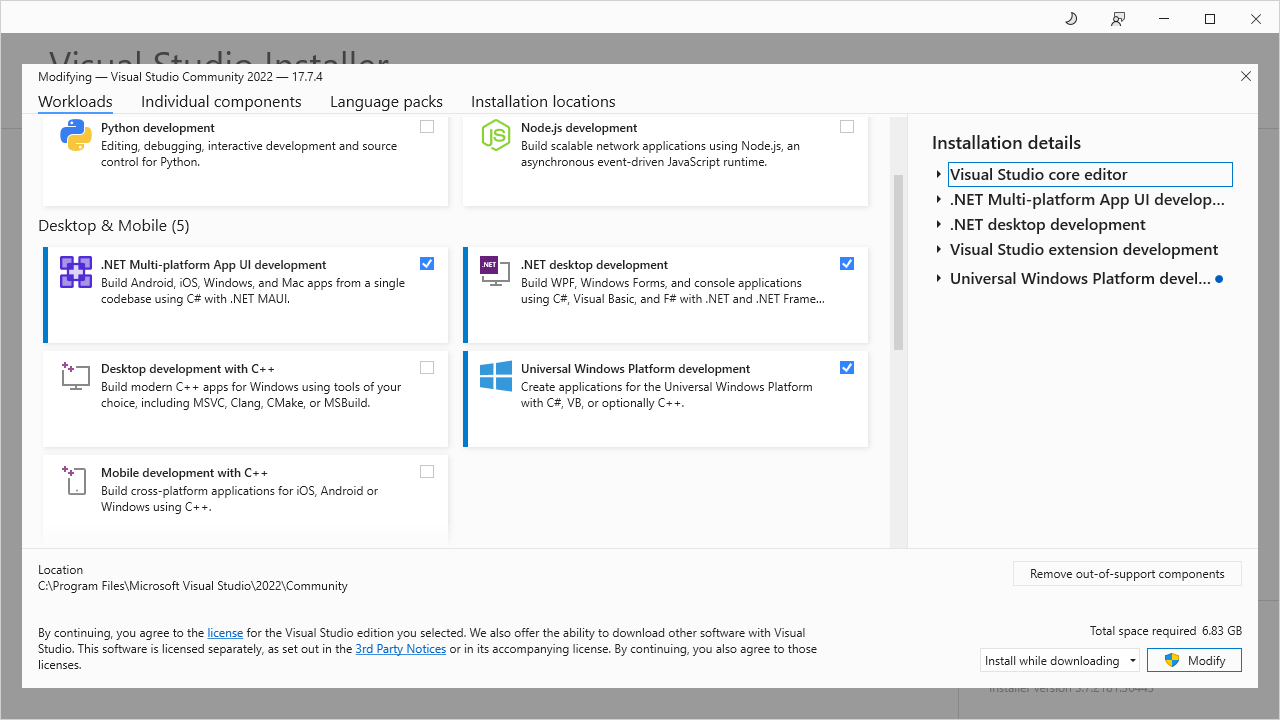
Once Visual Studio is installed we will install the monogame templates.
- Launch VS 2022
- Select the “Continue Without Code” option
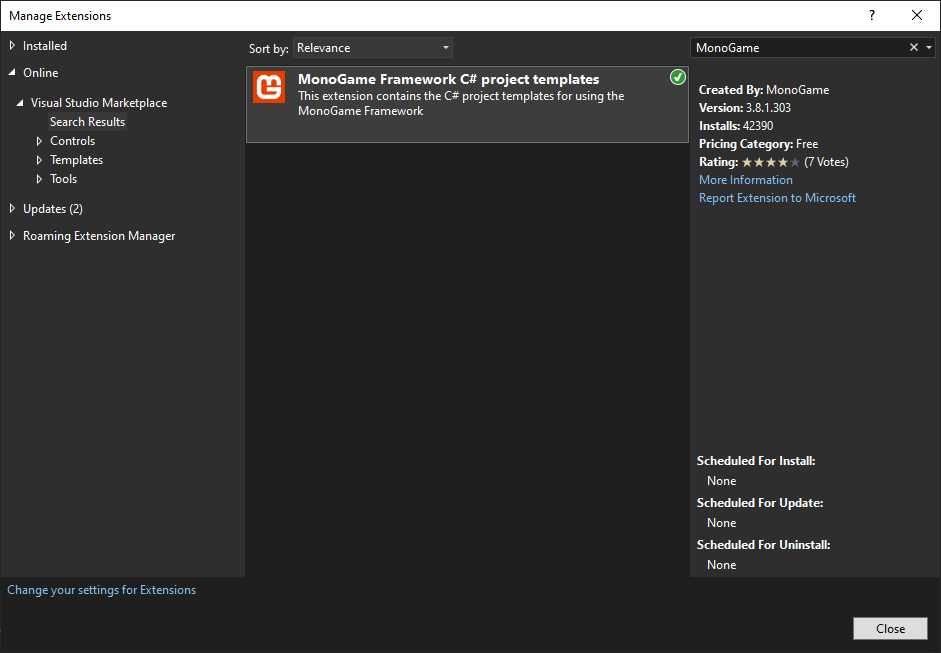
- At the top of your screen select “extensions” tab and then “Manage Extensions”
- In the search box search for “MonoGame” and install the c# project templates
You may be prompted to install it and close VS 2022 to proceed.
This will allow us to now use Visual Studio to create our game by selecting the template
OTHER DEV ENVIRONMENTS
If you prefer using Jetbrains Rider or Visual Studio Code (Like Myself) we will need to install the .NET SDK Here
Download the latest SDK for your operating system to continue
Once installed you should now have a new command tool. Run the following commands in your command prompt:
dotnet --version
Note you may need to close and re-open command prompt if previously opened.
Now that you have dotnet installed. You can create a project with the following:
    dotnet new --install MonoGame.Templates.CSharp
    dotnet new mgdesktopgl -o PixelPlatformer
We will be using the opengl template for this tutorial but there are several other templates for different backends.
Where -o is the project directory it will create.
Project has been made
Now that you successfully created your project with either VS 2022 Templates or via dotnet we will check out the code.
Firstly the files it created: Most of these we can ignore for now

We Will focus on the following
- Content
- Game1.cs
- Program.cs
The Content folder is where you will find Content.mgcb. This is where we “Pack” our assets for our game, be it images, sounds, effects, etc…
Game1.cs is the bulk of our game code is. This is the entry point for our game.
Program.cs is the file which will run our game to begin the Game1.cs method calls - We will just be changing the name of our game here.
Preparing our game
Lets open the Window!
To do so we could simply run this as is and it will open a window but we will change a few things first.
First, open Game1.cs
Here you will find the initialize function
protected override void Initialize()
{
    base.Initialize();
}
We will add the following code:
protected override void Initialize()
{
    _graphics.PreferredBackBufferWidth = 1280;
    _graphics.PreferredBackBufferHeight = 720;
    _graphics.ApplyChanges();

    base.Initialize();
}
This will change the Width & Height of our games window. I use 1920x1080 monitor so I am using 1280x720 for my Window. I recommend for this tutorial to stick with a 16:9 ratio window.
Before we finish up this part we will just rename our project.
Rename Game1.cs to PixelPlatformer.cs
And search in this file for any instances of Game1 and replace it with PixelPlatformer. Do not rename “Game” Only “Game1”
Here is my whole File:
using Microsoft.Xna.Framework;
using Microsoft.Xna.Framework.Graphics;
using Microsoft.Xna.Framework.Input;

namespace PlatformerTutorial;

public class PixelPlatformer : Game
{
    private GraphicsDeviceManager _graphics;
    private SpriteBatch _spriteBatch;

    public PixelPlatformer()
    {
        _graphics = new GraphicsDeviceManager(this);
        Content.RootDirectory = "Content";
        IsMouseVisible = true;
    }

    protected override void Initialize()
    {
        _graphics.PreferredBackBufferWidth = 1280;
        _graphics.PreferredBackBufferHeight = 720;
        _graphics.ApplyChanges();

        base.Initialize();
    }

    protected override void LoadContent()
    {
        _spriteBatch = new SpriteBatch(GraphicsDevice);

        // TODO: use this.Content to load your game content here
    }

    protected override void Update(GameTime gameTime)
    {
        if (GamePad.GetState(PlayerIndex.One).Buttons.Back == ButtonState.Pressed || Keyboard.GetState().IsKeyDown(Keys.Escape))
            Exit();

        // TODO: Add your update logic here

        base.Update(gameTime);
    }

    protected override void Draw(GameTime gameTime)
    {
        GraphicsDevice.Clear(Color.CornflowerBlue);

        // TODO: Add your drawing code here

        base.Draw(gameTime);
    }
}
And Program.cs
using var game = new PlatformerTutorial.PixelPlatformer();
game.Run();
To now test our “Game” In VS2022 simply press the Green start arrow in the top center
For dotnet users, open a terminal in the same directory as the “PixelPlatformer.csproj” and type
dotnet run .
If everything worked correctly you should now see a window pop-up with a nice Cornflower blue in our 1280x720 window.
Thats it for this part in the next part we will cover:
- Going breifly over the main methods in Game1.cs
- Loading our first image using Content.mgcb
Please join the MonoGame Discord if you have any questions. Please feel free to ping me (Ellie.x3) in my Forum post for this blog. Discord